Ceiling fans are an essential component of any home, providing comfort and energy savings. However, a noisy ceiling fan can be a nuisance and detract from the comfort they’re meant to provide. Whether it’s a buzzing sound, rattling, or knocking, it’s important to address the issue to restore peace and tranquility to your space. In this comprehensive guide, we will discuss the common causes of ceiling fan noise and provide step-by-step instructions on how to troubleshoot and repair these issues. Whether you prefer a DIY approach or decide to hire a professional, this guide will help you find the most suitable solution for your noisy ceiling fan.

1. Why Does My Ceiling Fan Make Noise?
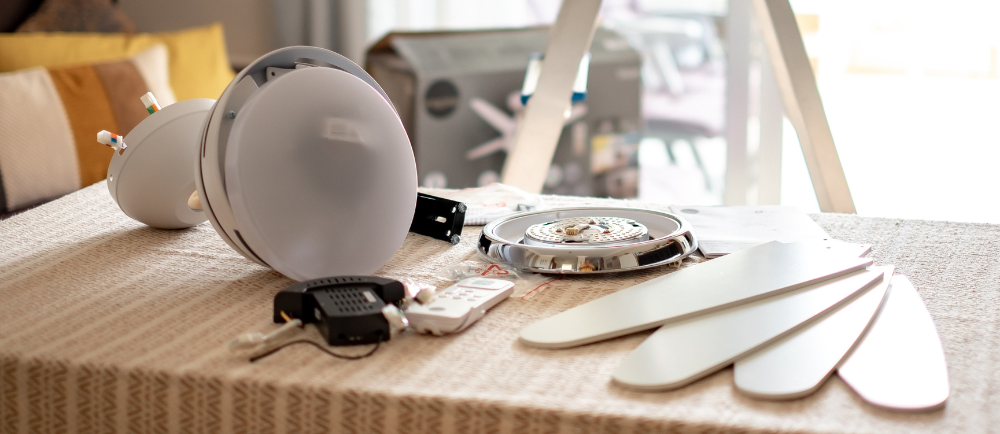
A noisy ceiling fan can have several causes, including loose screws, unbalanced blades, motor issues, dirty or damaged bearings, and poor installation. Let’s take a closer look at each of these factors and how they contribute to the noise.
Loose Screws
One of the most common causes of noise in ceiling fans is loose screws. Over time, the vibrations from the fan’s operation can cause screws, bolts, and other fasteners to become loose. These loose components can lead to rattling and clanking sounds. To address this issue, you’ll need to inspect various parts of the fan for loose screws:
- Blade brackets: Check the screws holding the blade brackets to ensure they are tight. Also, verify that the screws connecting the blades to the brackets are secure.
- Motor assembly: Inspect the motor assembly for any loose screws or bolts, including the motor housing and mounting brackets. Tighten them as necessary.
- Downrod: The downrod connects the fan to the ceiling mounting bracket. Ensure that it is securely fastened to the motor assembly and the mounting bracket.
- Canopy: The canopy is the decorative cover that hides the wiring and mounting bracket. If the screws securing the canopy are loose, tighten them to eliminate any noise.
- Light fixture: If your ceiling fan has a light fixture, check the screws holding the fixture in place, as well as any connections between the fixture and the fan.
Unbalanced Blades
Moving on, another common cause of noise in ceiling fans is unbalanced blades. To check for unbalanced blades, follow these steps:
- Turn off the fan and wait for the blades to come to a complete stop.
- Use a balancing kit or a yardstick to measure the distance between the ceiling and each blade tip. Make a note of any significant differences.
- Attach a balancing clip or weight to the top of the blade that is farthest from the ceiling. Start with a small weight and test the fan to see if the noise has improved. Continue adding or adjusting the weight until the fan operates smoothly and quietly.
Balancing the blades may require some trial and error, but it is an effective way to reduce noise caused by imbalance.
Motor Issues
Faulty or malfunctioning motors can also contribute to ceiling fan noise. If the motor is making grinding, humming, or buzzing sounds, it may need to be repaired or replaced. However, before assuming the worst, check for any loose screws or other parts that may be causing the noise. If the noise persists after tightening all components, it’s best to consult a professional electrician or a ceiling fan repair specialist to assess and repair the motor.
Dirty or Damaged Bearings
Ceiling fan bearings can accumulate dirt and dust over time, leading to noise and reduced performance. Additionally, bearings can become worn or damaged, resulting in a grinding or squeaking sound. To address this issue, follow these steps:
- Turn off the fan and wait for it to come to a complete stop.
- Locate the bearings, which are typically located at the top of the motor assembly.
- Clean the bearings using a soft brush or compressed air to remove any dirt or debris.
- If the bearings are damaged or worn, they may need to be replaced. Consult a professional for assistance in replacing the bearings.
Regular cleaning and maintenance of the bearings can help prevent future noise issues.
Poor Installation
Improper installation of a ceiling fan can lead to noise problems. If the fan is not securely mounted or if the blades are not aligned properly, it can create vibrations and noise. To ensure proper installation:
- Make sure the ceiling fan is securely mounted to a stable electrical box.
- Check that the blades are properly aligned and tightened to the motor assembly. Use a measuring tape to ensure they are equidistant from the ceiling.
- Verify that all electrical connections are secure and properly insulated.
If you suspect that poor installation is causing the noise, it’s best to consult a professional electrician or a ceiling fan installation specialist to assess and correct any installation issues.
2. How to Repair a Noisy Ceiling Fan
Now that you understand the potential causes of a noisy ceiling fan, let’s explore the step-by-step process to repair the noise and restore tranquility to your space.
Step 1: Tighten Loose Parts
Start by thoroughly inspecting the fan for any loose screws, bolts, or fasteners. Use a screwdriver or wrench to tighten any loose components, including blade brackets, motor assembly, downrod, canopy, and light fixture (if applicable). Ensure that all parts are securely fastened to reduce vibrations and eliminate rattling or clanking noises.
Step 2: Check for Unbalanced Blades
To address unbalanced blades, follow these steps:
- Turn off the fan and wait for the blades to come to a complete stop.
- Measure the distance between the ceiling and each blade tip using a balancing kit or a yardstick. Make a note of any significant differences.
- Attach a balancing clip or weight to the top of the blade that is farthest from the ceiling. Start with a small weight and test the fan to see if the noise has improved. Continue adding or adjusting the weight until the fan operates smoothly and quietly.
Balancing the blades may require some trial and error, but it is an effective way to reduce noise caused by imbalance.
Step 3: Inspect the Motor
If the noise persists after tightening all components and balancing the blades, it’s important to inspect the motor for any issues. Follow these steps:
- Turn off the fan and wait for it to come to a complete stop.
- Carefully examine the motor housing for any signs of damage or loose parts.
- Check the mounting brackets and screws to ensure they are securely fastened.
- Turn the fan on and listen for any unusual sounds coming from the motor. If you hear grinding, humming, or buzzing sounds, it may indicate a motor problem.
Motor that make abnormal noises are no good. Consult a professional electrician or a ceiling fan repair specialist to assess and address the motor issue.
Step 4: Clean or Replace Bearings
Dirty or damaged bearings can contribute to ceiling fan noise. To clean or replace the bearings, follow these steps:
- Turn off the fan and wait for it to come to a complete stop.
- Locate the bearings, which are typically located at the top of the motor assembly.
- Clean the bearings using a soft brush or compressed air to remove any dirt or debris. Be careful not to damage the bearings during the cleaning process.
- Replace any damaged or worn out bearings. Consult a professional for assistance in replacing the bearings.
Regular cleaning and maintenance of the bearings can help prevent future noise issues.
Step 5: Ensure Proper Installation
If you suspect that poor installation is contributing to the noise, it’s important to address any installation issues. Follow these steps:
- Verify that the ceiling fan is securely mounted to a stable electrical box. You may need to replace or reinforce if the box is loose.
- Check that the blades are properly aligned and tightened to the motor assembly. Use a measuring tape to ensure they are equidistant from the ceiling.
- Ensure that all electrical connections are secure and properly insulated.
If you’re unsure about the installation or if the noise persists after addressing all other potential causes, it’s best to consult a professional electrician or a ceiling fan installation specialist to assess and correct any installation issues.
3. Proper Maintenance to Prevent Future Noise Issues
To prevent future noise issues with your ceiling fan, it’s important to perform regular maintenance. Here are some tips to keep your fan operating smoothly and quietly:
- Clean the fan blades regularly to remove dust and debris that can cause imbalance and noise.
- Lubricate the motor bearings annually to ensure smooth operation.
- Check for any loose screws or bolts and tighten them as necessary.
- Inspect the fan for any signs of damage, wear, or loose parts, and address them promptly.
- Avoid overloading the fan by using the appropriate size and weight of light fixtures or other attachments.
- If you notice any unusual noises or performance issues, address them promptly to prevent further damage.
By following these maintenance practices, you can prolong the lifespan of your ceiling fan and minimize the risk of noise issues.

In conclusion, a noisy ceiling fan can disrupt the tranquility of your space. By understanding the potential causes and following the step-by-step repair process outlined in this guide, you can effectively address the noise and restore peace to your home. Whether you choose to tackle the repairs yourself or seek professional assistance, maintaining a well-functioning and quiet ceiling fan will enhance your comfort and enjoyment. Remember, when in doubt, consult a professional electrician or a ceiling fan repair specialist on Zonar to ensure safety and optimal performance.
Stay updated with Zonar by connecting with us on social media – ( IG , TikTok and Facebook) for additional tips and insights.
Interested in keeping your space cool and comfortable? Explore our guide on Staying Cool in Malaysia’s Hot Weather: 7 Tips to Beat the Heat for practical tips to combat the heat. It complements our comprehensive guide on troubleshooting and repairing noisy ceiling fans!


